Cozumel México – The flight down

First thing Monday morning we were headed on our way to Cozumel México. To say we were excited would be an understatement statement. Hubby, Karen, and I neither one slept much the night before. Hubby was excited, I couldn’t get comfortable, Karen was kept awake by the snoring, and Jared said he didn’t sleep much either. Maybe we should have just turned on the tv and had a camp out. lol.

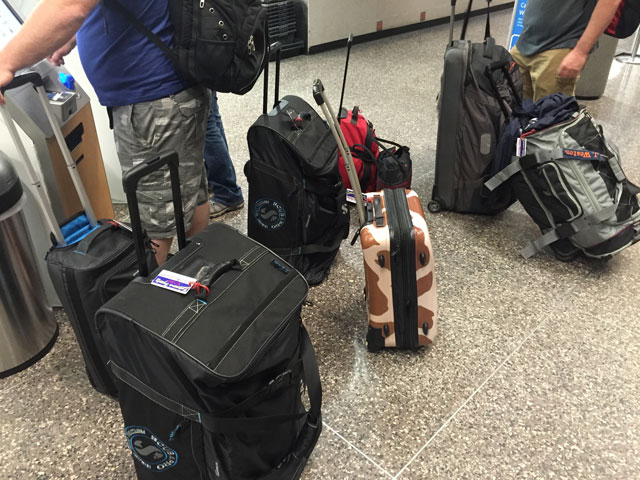
So when you’re going on a destination Scuba diving trip, it is best to take your own BC, your own regulator, your own mask, your own fins, your own dive computer, and your own wet suit. And that’s all fine and dandy but…… you have to do a checked bag to get that all there too. Currently with American Airlines, 50 pounds is $25. If you’re over 50 lbs…. it jumps to $100. That’s definitely a reason not to go over. You’d be better off putting in 2 checked bags because a second bag takes the price up to $40. We had our weights down to 49.something lbs. Yup, we were pushing that limit but we made it! Whew! Then we each had a carry on and a backpack (personal item).

Now when you’re traveling with all your dive gear, make sure you carry on your regulator, your mask, and your dive computer. Also if you take an underwater camera, carry that on too. Hubby’s BC is heavier than mine, and that is without weights in it. So he had to put some of his stuff in my bag to make sure we were both under weight. We both took a 1 1/2 mil wetsuit. That was totally enough for diving in the ocean… down there anyway. In fact I dove without a wet suit once and so did he. I just had a long sleeved rash guard on with my swimsuit.

Anyway…. back to traveling down there. Checking in was easy. Note: carrying on regulators/dive computers/etc sometimes causes bag searches. Hubby’s got searched. Deb said hers usually does but they got by without being checked.

Hubby and I have TSA Pre-check so we went right through. You don’t have to pull out laptops, you don’t have to take your shoes off, you don’t have to take jackets off… stuff like that. Then we went and waited on our crew to come through. Once they got through, Doug found a Starbucks so I ran and got some too. Yup, because of that I was one of the first through but then everyone wound up waiting on me. haha. That wasn’t too big of a deal though because we have to be there 2 hours before anyway. We had time to kill.
(more…)

Boots Boots and more Boots {and Tips on taking care of Leather!}

My love/hate relationship with Facebook paid off once again this week. Why do I say love/hate? Well because sometimes I love to hate it! Sometimes people overshare on Facebook. Sometimes people take what you say wrong on Facebook. Sometimes….. the stories go on and on. Use your imagination.

Don’t get me wrong, it’s a great place to connect with old friends and new friends a like. a great place to share recipes and pictures. And a great place to find deals on boots!

Oh, wait, what? Boots? Yes, boots. This past weekend I was on Facebook, and a group that I’m a member of Farm Hats had a post about a Durango Boots discount. I read through the post and it said that if you ordered with the code FFACHAPTER you got a pair of FFA Durango Boots for $49. I thought that seems too good to be true.

So I went on to the website and it showed that they were $149 (or if men $152 or something like that). I went ahead and added a pair to my cart, plugged in the discount code, and bam… $49 pair of FFA Durango boots. No tax and you could get free shipping for $2 for FedEx shipping. I showed it to the hubs and also shared it on my Facebook page for others to benefit from.

Then that night hubby and I decided (and I use hubby and I loosely, he did it 😉 I just benefitted from it) to order us each a pair. One… the website said $2 was donated to the FFA (I’d have liked a little more but whatever) and two, you can’t beat a pair of $49 pair of boots.

They arrived yesterday. I was sooooo happy! Oh and get this… The box said they donate $5 per pair of boot to the FFA. Even better!!

(more…)

dSLR Education: Full Frame versus Crop Sensor

If you’ve been friends with me or followed this blog for a while now, you’ll know I love photography. If by chance you’re new to these parts, let me tell you now, I love photography. Now you’re up-to-date :).

I bought my first dSLR September of 2009 before I really even knew what a dSLR was. In fact, I had to research it after my first photography class I took because they were talking about it in the class and I didn’t know what dSLR stood for. Sad but true. I feel like I’ve come a long way since then, but I’ll tell you that there is still a ton more to learn.

Photography is one of those things that newbies and oldies can learn something new, if nothing else, a different camera and how it works.

A couple years ago when we were looking to upgrade my Nikon D90 I couldn’t decide between a crop sensor or a full frame sensor. I knew nothing about the difference really. I did some research but I really didn’t know the difference still. Finally I came to the conclusion through my photography, a camera body was more expensive or a lens was more expensive. Other than that…. I didn’t know the difference and couldn’t decide what to do.

After weighing all my options I decided to go on to get another crop sensor camera. I upgraded to the Nikon D7100. I truthfully didn’t feel like I got jipped by going with the crop sensor, really you just compensate for it. I can tell you my D7100 has a crop factor of 1.5. So if I shoot with a 50mm lens, it’s like shooting with an 85mm lens, to get more like a 50, I’d have to back off to a 35 mm lens. I’m still not sure what that 1.5 means, I can just tell you that’s what it is.

So with a full frame, if you shoot with a 50mm lens, it’s like shooting with a 50mm lens. Wow, like that explanation?

So what does all that mean, really? Again, I wasn’t sure. A friend of mine had a Canon Mark 5D Mark II. It is a full frame camera in the Canon series. So I sent her a text asking if I could come play with her dSLR sometime to get the difference. She told me to come on.

Before I made it out there, I actually got to shoot with a Nikon full frame, it is the D610. Upon a little more research, the D610 is extremely similar to my D7100 except well, it’s full frame. So let’s let some pictures tell the story.

(more…)

Horse Trivia: Witches Knots

Is anyone else as ready for this weekend as I am? This has been an extremely long week and I’m exhausted. You know though… I’m tired of complaining about being tired. ha! I’m not sure I’ll ever get fully rested so I might as well just take it like it is and be done with it.

Tomorrow hubby has to go with the Missouri Governor’s Mounted Guard to help park cars at a Bluegrass festival. I’ve been asked/invited to go but I may get stuck at home doing homework. Ugh, beautiful weather and I’m stuck inside doing homework… Well it could be worse I guess!  So really I don’t know what my plans consist of yet. We’ll take it as it comes. And who’s to say I can’t go park my butt in a lawn chair in the front yard to do homework.

But being as though they are the Missouri Governor’s MOUNTED Guard… mounted means they’re riding something and that something is their trusty stead. In case you don’t know what that is… that’s a horse.

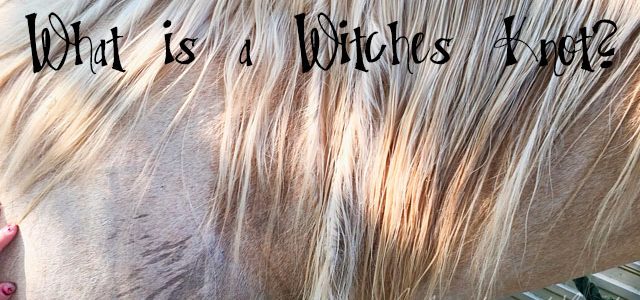
So I only thought it fitting to give you a little information about horses today. That information is about “Witches Knots.”

They really are the biggest pain in the butt. As you can see, it almost looks like a human who has dreadlocks. Now I’m not sure how that person who has dreads gets them out… maybe they have to cut their hair? But I can tell you how to get a Witches Knot out without cutting it out… although sometimes you might get so frustrated you want to cut it out.

(more…)

How to: Make a Photo Wall

There has been a lot of uncertainty in our life in the last couple of years. Truthfully more than I even want to admit to… I know that God has great plans for everything and everything will work out in the end. I know that all the trials and tribulations help us grow into the people he wants us to develop in to. But I also know sometimes I just want to scream, pack up the bare minimum, move to a place no one knows me (far far away) and start a new life. Whew… uncertainty is very scary to say the least :). But that last part is an extreme.

So with that out of the way… If you know me at all, I take pictures of EVERYTHING. Think I’m kidding, just check my camera/phone/computer/external hard drive. No joke! For a long while I’ve wanted a photo wall, and I had one for a bit, then we took it down, and now we’re putting it back up. It goes with some of that uncertainty….

The initial photo wall was hung up with the Command Strips so that it wouldn’t put holes in the walls or do damage to the wall paper, etc… yeah that didn’t work. Sad but true. I don’t know if my sticky part of the command strips was too old or the wall paper was the wrong texture or what, but after I put them up, they came back down, some quickly (like a few days). It was extremely frustrating! So this time around there are holes in the wall. It was just easier that way…

Now here’s how to do it:

What you’ll need:
Photo frames/Photos (sizes up to you!!)
Paper
Pen
Scissors (just for cutting… ha. see below.)
Tape
Command Strips or Screws
if screws, then you need a drill
A Wall for photos

1. You’ll want to trace your photo frames on to paper. The first time around I used newspaper, this time around I used regular notebook paper, except for my 8×10 frames. Then I went into Tbug’s room and stole some used poster sized paper. Trace the size of your photo frames out onto the paper.

(more…)

Hay Season 2015: Field Fires

Okay… I guess I’ll share the story. It really isn’t much of a story but….

Sunday evening I had just gotten back from taking Tbug to her mom’s house. I left Abug sitting in her chair up by my house with my mom and went down to help dad with the tractor. Earlier I had been on the big tractor raking and just as I got done with the last row the tractor started acting funny so I shut it down. Turns out a line that runs hydraulic fluid broke and I drained the tractor of hydraulic fluid. #fail. But I shut it down the minute I realized something wasn’t completely right so I had that going for me.

So I was helping dad tear the line off to fix it and I start hearing a horrible metal clanging sound over in the field where hubby was on the other tractor baling. About that time I heard dad say shut it down you’re going to catch it on fire and then the fire broke out. Ugh! I ran to the edge of the field to see what was going on and then took off running (in flip flops, shame) toward the house to get a shovel. I wasn’t about to be able to put the fire out in flip flops.. this is why you farm in boots….

(more…)

Butt Rub

I’ve told you that my husband is all about the spices.  Anywhere we go, we both look at them trying to find some we don’t have or want to try.  When we made our trip to Kentucky in 2010 (wow that was a long time ago) we stumbled across something called Bad Byron’s Butt Rub.  We bought some.  We’ve used it on all kinds of things from meats to vegetables to even stirring it into mac & cheese to jugge (sp??) it up.  OMG we fell in love.  And by the way, this isn’t a sponsored post, promise.  We paid for everything prior and in this post, we just love the stuff so much.

There was a website so hubby went on to order us some more.  You have NO idea how good it is sprinkled in Mac & cheese.  In fact Zebra Girl and Tbug loved it the other weekend when I did it for them.  Yup, that good.

So hubby went on line and ordered us this little gift basket.

It came with a Tshirt and you can see if you want to go onto their youtube video they have ways to cook with it as well.

(more…)

Homemade Laundry Soap

Dry ingredients {found in detergent aisle}:

  • 4lb 12 oz (76oz) – Borax Laundry Booster
  • 4lb (64 oz) – Arm & Hammer Baking Soda
  • 3lb 7 oz (55oz) – Arm and Hammer Super Washing Soda
  • 3 Bars  – Fels-Naptha Soap
  • 3.5 lb (56 oz) – Oxy Clean {any brand}

Supplies:

  • Fine Cheese Grater
  • Large Mixing Bowl
  • Heavy Plastic Bag
  • 5 Gallon Bucket
  • Container to store Homemade Detergent

Directions:

  1. Start by finely grating the Fels-Naptha Soap into a large mixing bowl.
  2. Next, line a 5 gallon bucket with a heavy plastic bag.
  3. Pour all dry ingredients a little at a time, into plastic lined bucket.
  4. Mix dry ingredients until they are evenly dispersed.
  5. Once mixed, store homemade laundry soap in a container of your choosing.
  6. Recipe makes about 2 gallons (256 oz)

(more…)

Who’d a thunk it?

Pretend this is white & not yellow!!

love this idea (saw it on Rachael Ray)! Did you know that you can use a regular white onion (peeled and sliced in half), to treat a burn!
No more buying expensive aloe vera gel (or the cheapy stuff) – just keep an onion on hand!
So here’s how to use an onion to treat a burn:

  • Use a freshly cut onion and squeeze the juices onto the burn
  • Use the onion as soon as you cut it – otherwise it loses its’ healing properties
  • Keep it on the burn for as long as you need – until you feel the pain decreasing or going away

Only use this for first or second degree burns. Do not try this for third degree burns as those require medical attention!

Gluten Free Cooking & Corn Starch

I have two friends who are supposed to eat Gluten Free, so when I cook for them, I try (key word) to adhere to that, but it’s taken a bit of education on my part.  So I thought I’d pass on some knowledge that I’ve learned.

Cornstarch is made from corn kernels, which do not contain the gluten protein that causes problems in people with celiac disease and gluten sensitivity.
Therefore, pure cornstarch is gluten-free. But when you’re eating gluten-free because gluten — even a tiny bit of gluten — makes you sick, you need to consider whether the cornstarch you’re buying has been manufactured in a way that avoids potential sources of gluten cross-contamination.
Many of the brands on the market are made in shared facilities or on equipment shared with wheat products, and so they aren’t considered gluten-free. However, there are a few brands out there that are safe on the gluten-free diet.

Cornstarch Is Extremely Useful for Gluten-Free Cooking

Info found here