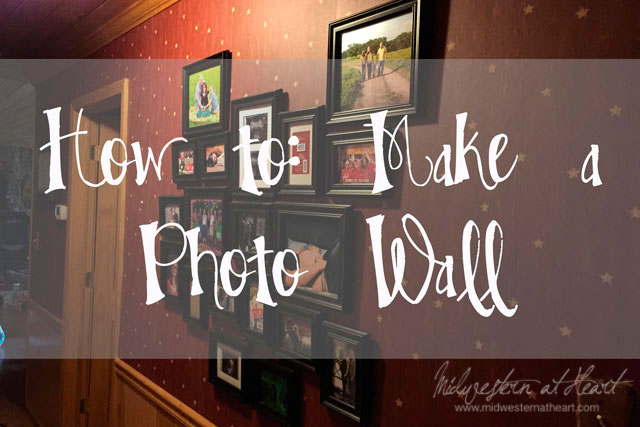
How to: Make a Photo Wall
There has been a lot of uncertainty in our life in the last couple of years. Truthfully more than I even want to admit to… I know that God has great plans for everything and everything will work out in the end. I know that all the trials and tribulations help us grow into the people he wants us to develop in to. But I also know sometimes I just want to scream, pack up the bare minimum, move to a place no one knows me (far far away) and start a new life. Whew… uncertainty is very scary to say the least :). But that last part is an extreme.
So with that out of the way… If you know me at all, I take pictures of EVERYTHING. Think I’m kidding, just check my camera/phone/computer/external hard drive. No joke! For a long while I’ve wanted a photo wall, and I had one for a bit, then we took it down, and now we’re putting it back up. It goes with some of that uncertainty….
The initial photo wall was hung up with the Command Strips so that it wouldn’t put holes in the walls or do damage to the wall paper, etc… yeah that didn’t work. Sad but true. I don’t know if my sticky part of the command strips was too old or the wall paper was the wrong texture or what, but after I put them up, they came back down, some quickly (like a few days). It was extremely frustrating! So this time around there are holes in the wall. It was just easier that way…
Now here’s how to do it:
What you’ll need:
Photo frames/Photos (sizes up to you!!)
Paper
Pen
Scissors (just for cutting… ha. see below.)
Tape
Command Strips or Screws
if screws, then you need a drill
A Wall for photos
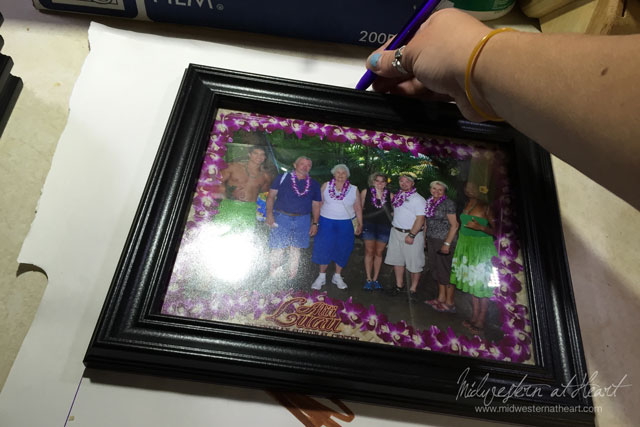
1. You’ll want to trace your photo frames on to paper. The first time around I used newspaper, this time around I used regular notebook paper, except for my 8×10 frames. Then I went into Tbug’s room and stole some used poster sized paper. Trace the size of your photo frames out onto the paper.
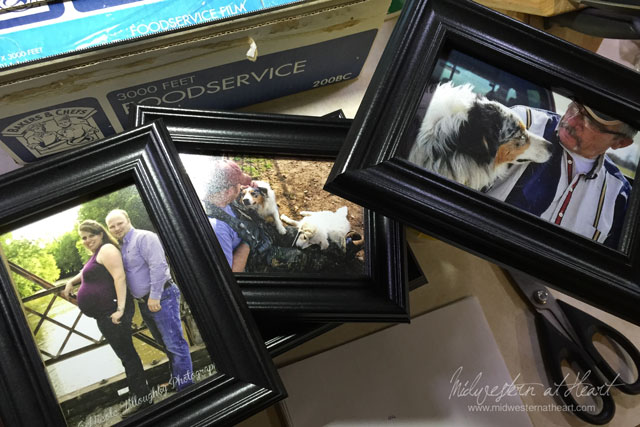
2. Using your scissors (just for cutting) cut out the sizes of your photo frames. I used 4×6’s, 5×7’s and 8×10’s. My frames came from Walmart so that hopefully if I needed to buy more I could get the exact ones. If not, maybe I can add different ones in at a later date. We’ll see.
Scissors just for cutting reference… Dumb comment by me. So one day I bought a pair of scissors just for cutting material (fabric). I walked in the house and pulled them out of the sack showing the scissors to hubby saying, “Now, these scissors are only for cutting.” Then I walked off. I forgot to add material/fabric to the end of my sentence. Now like 3 years later any time scissors are bought or looked at or moved (whatever) they are referred to as scissors just for cutting.

3. Now if you are using multiple sized photos, it is helpful to mark on the paper what size frame the paper is made for. My photo wall is very random but if you are very specific on your wall, this sizing mention is extremely handy.

4. Another helpful thing is to have your pictures ready. I don’t have all the pictures printed out that will be included on my wall but those I did I went ahead and placed in the photo frames. On my pieces of paper I drew arrows to show which way the frame should be placed on the wall.

5. My wall is next to my bedroom so I spread the paper sizes out on the bed, placing them the way they will go on the wall to help aid in placing them on the wall. My wall is random so I placed my 8×10’s first so that there was room on the wall for the frames.

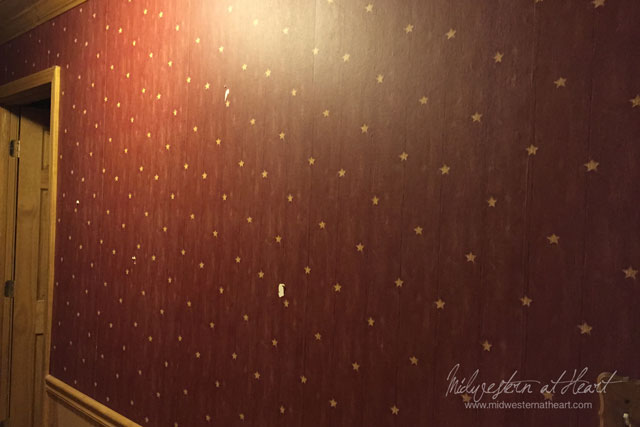
6. Ah, the blank canvas. See the white splotches on the wallpaper? That’s where the command strips came off the wall. They harmed my wall :(. I did not wall paper the wall, it was here when we moved in but it covers so much of the walls that we haven’t decided to pull it down and make it our own yet (and we’ve lived here 5 years).
7. Now it is time to place the papers on the walls in the order/place you’d like the particular photos. This helps you decide where to place each photo frame without drilling holes in the wall and winding up with more than you wanted. Plus you aren’t having to put a picture up and then later decide you didn’t like where it was. In fact, I put this up one night and stared at it a couple days before we put the pictures on the wall, that way I could guarantee I liked the placing of the photos.

8. Finally it is time to use a drill, place the screws in the wall (or the command strips on the wall) and put your photos up. I was actually in class the night this was done. I got to come home to my beautiful picture wall, finished by my husband. I love you baby!
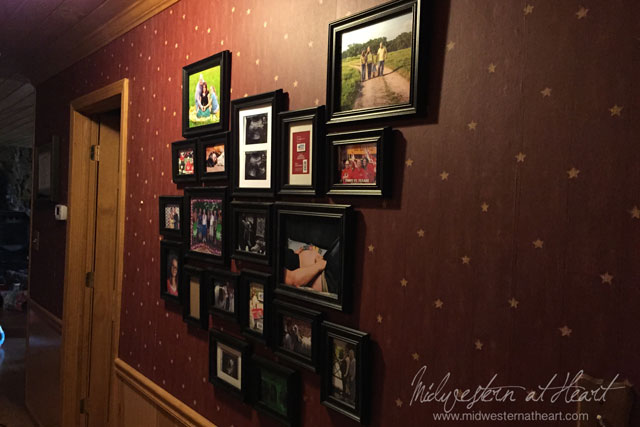
Now I don’t have photos in all the photo frames. Plus I can either change out photos as I please or there is area to buy more frames and add to my picture wall.
This is just a great way to display a lot of photos in a small area. One complaint I have about our house is I just don’t have enough walls for photos. But, I love pictures so…..