Cinnamon Sugar Pretzel Bites
Over the weekend I found myself in Gravette, Arkansas. We were at a BBQ Smoking contest called Smoke on the Border. I’ll delve into that more in another post, but… as Hubby and Jared were moving stuff down on Friday afternoon, I found myself in the kitchen. I had it in my head I wanted to make something on the sweeter side, simply because of all that savory food I knew we were going to be eating over the weekend. That’s when I decided on Cinnamon Sugar Pretzel Bites. Still a little savory from the dough, but that sweet side from the sugar and the heat from the cinnamon. Just seemed like the perfect combination.
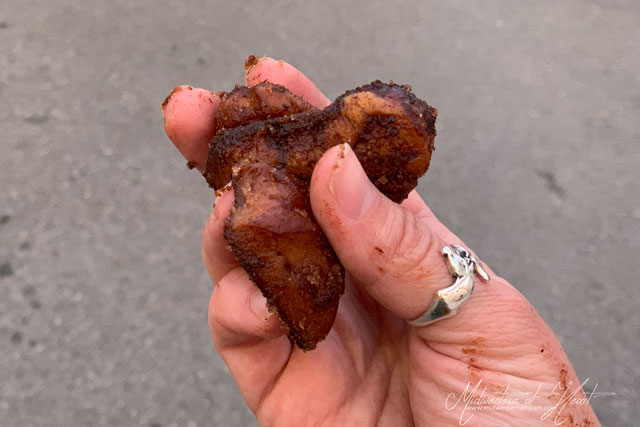
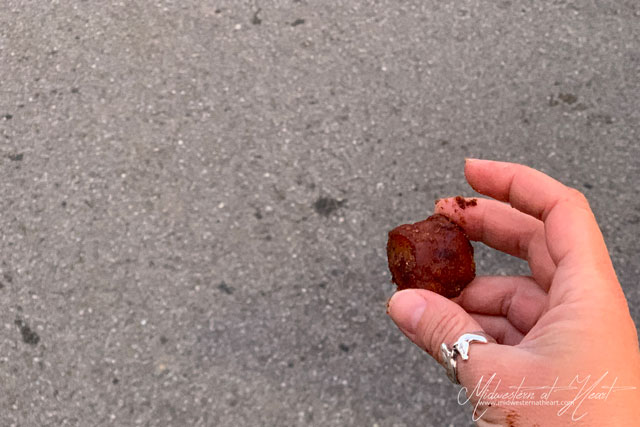
Handheld little bites of yumminess. Although as you can see on my hand above, being in a zip lock bag, I brought some of that topping out on my hand for a nice dose of stickiness too. Hey… you win some… you lose some… and in this case, I’m pretty sure I won because hello YUM!

All in all, it was a fabulous weekend. I think we all kind of needed a weekend away because of all of the demanding work we’ve done on the house lately anyway. And no, we’re not moved in yet. Yes, I still have been taking pictures. And of course, I’m sure I share with you… I just haven’t yet.
Cinnamon Sugar Pretzel Bites
Yeast
If you have never tried making pretzel dough before, don’t worry, it is easy! Yes, it does work with Yeast. It is a yeast dough. But Yeast isn’t scary. Sometimes I’ll admit it can be frustrating and demanding. It can even be intimidating, but really, nothing to worry about, I promise.
So, there are 2 types of Yeast. There is Instant and Active Dry.
Instant Yeast
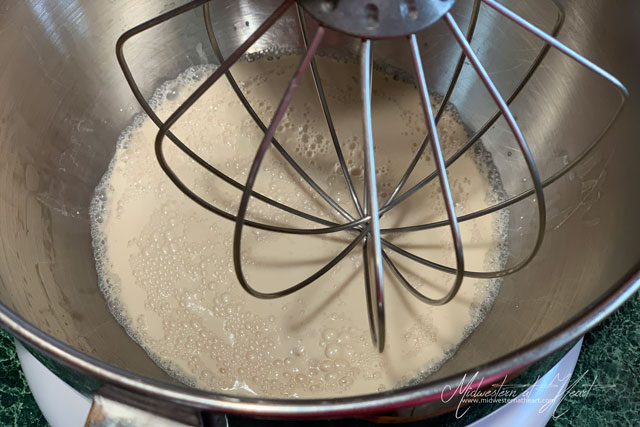
Instant yeast is a yeast that has been ground into finer granules than Active Dry. This allows it to dissolve into the dough a little quicker. It is sometimes referred to as “Bread Machine Yeast.” You do not have to proof the yeast if you don’t want or have the time, but at the same time you can if you’d like. And instead of Proofing it (adding it to water with a little sugar, then adding into your mixture) you can add it directly into your dry ingredients.
Instant Yeast is a different strain of yeast so it produces a slightly different flavor than Active Dry Yeast.
Active Dry
This is a common yeast found in the supermarket. Truthfully, this is what I keep on hand. I buy in bulk quantities and keep it in an air-tight container in the freezer when I’m not using it. To make it, they remove the liquid from the yeast and ground it into small granules. Most times when you use this yeast, you proof it. Again, to proof it, you add it to warm water with a little sugar, allow it to sit for 5-10 minutes until it bubbles and then it’s ready.
Some of the things I read said that this is a myth that you have to proof active dry yeast. They say that it is produced in such a way that you can add it directly to dry ingredients. I’ve never tried this nor have I ever seen anyone try it, so my suggestion would be to stick to the “way it’s always been done” unless you want to experiment and see what happens.
Let me know if you do! I may try this too someday. I am always the one who tries these things I read.
The Dough
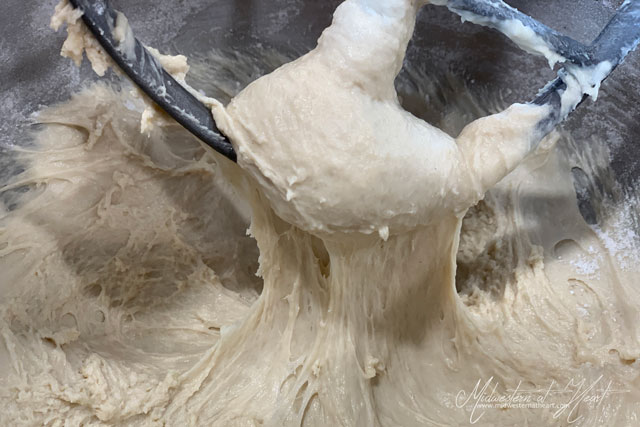
Back to the pretzels. So, you proof your yeast, add it to the mixer with the next few ingredients (i.e. sugar, flour, etc you know the routine). Then comes the mixing. You want to mix it until the dough is smooth and pretty. It will still be sticky to the touch but that’s okay. Sticky to the touch means it kind of comes up with your fingers, but releases. Like touching tape… If it is so wet it globs on your finger and doesn’t come off and you’re cussing (oh wait, no don’t do that… haha) then, by all means, add a little more flour, slowly.
The Rise
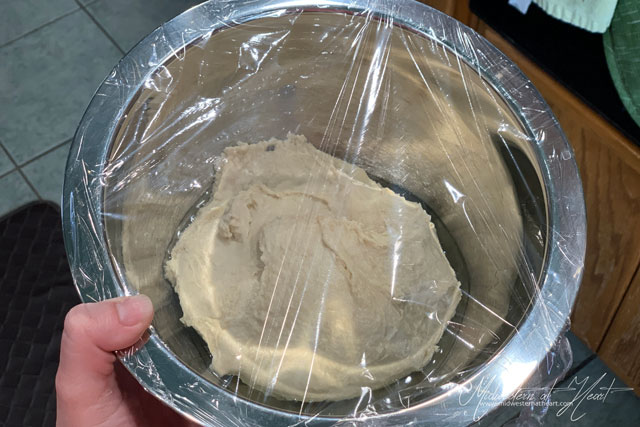
Now to let it rise. In the summer months, I find it easier to find a warm spot to let the bread rise. Hello, it’s summer. It’s hot! But… in Spring, Winter, and Fall, that’s another story. Here in Southwest Missouri, we’ve had highs of 80 one day and highs in the low 60’s the next. We’ve gone from upper 70’s for highs to barely reaching 50 the next day. Mother nature is off her meds and we’re on a roller coaster ride in the weather. 2 tricks that I use to find that perfect “warm spot” is…
- I turn the oven on to the lowest heat setting (mine comes in somewhere around 200˚F). Then I kill the heat, crack the door open, and just before I put the bowl into proof, stick my hand in to make sure it’s not hot but more than room temperature.
- I put a small bowl of water in the microwave, turn it on for 30 seconds to a minute. When it’s done, pull the bowl out and then the microwave isn’t so cold but it’s not hot either. I put that bowl of water in there simply because it’s not good on a microwave to run without something in it… anyway that’s what my momma always told me and I listen… sometimes.
I chose the microwave option the other day because I was also making homemade biscuits (p.s. if you’ve never made these biscuits, do it. You’ll thank me!) for breakfast on Sunday. Although, if you’d like to laugh at me, I got upset at myself because the oven was going, and there was something in the microwave and I needed the microwave. Oy… the struggles. #firstworldproblems
To Prepare
Now, if you know anything about bread, normally you let it rise once. Mold/shape/whatever it, then you let it rise again. Not this time. We’re breaking the rules. I like to be a rule breaker! Actually, if you know me, that’s a lie and I really hate lies so scratch that all together please!
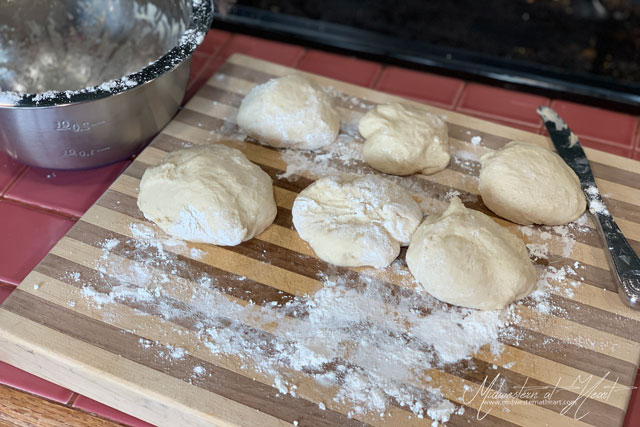
Once you have let the dough rise and it has doubled in size, you get to punch it! Ok, well use that word/phrase lightly. Basically, you make your hand into a fist and deflate it. I’m not sure punching would be a good idea, you might hurt your hand when it met the bowl. Just saying. Divide your big ball into 6 equal sized balls. I’m not sure I quite did that, but I was close in shape/size.
Then comes the fun part of smacking it against the surface. WHAT?!?! Who knew this could make you feel so good? Take all those frustrations out! Yey! It’s getting real up here y’all! So truthfully, you have 2 options here.
- find a large surface, (my cutting board there is not large enough, but I make do) grab one ball of dough at a time, leaving the rest covered with plastic wrap so it doesn’t dry out. Then roll it between your hands and/or your work surface until you get a long skinny “rope” of dough about 24-28 inches long.
- Option 2 is more fun and here comes the smacking part. So… your other option is to roll the ball of dough between your hands until it’s no longer a circle but more oblong. Then you start kind of swinging it around like a jump rope letting it smack your work surface every round. I know it sounds weird, but it’s uber easy (no not the ride company) and so much fun. Again, you want to “smack” it out to about 24-28 inches long. One thing you have to be mindful of in this option is don’t let the dough break. As you work with it, you’ll see what I mean.
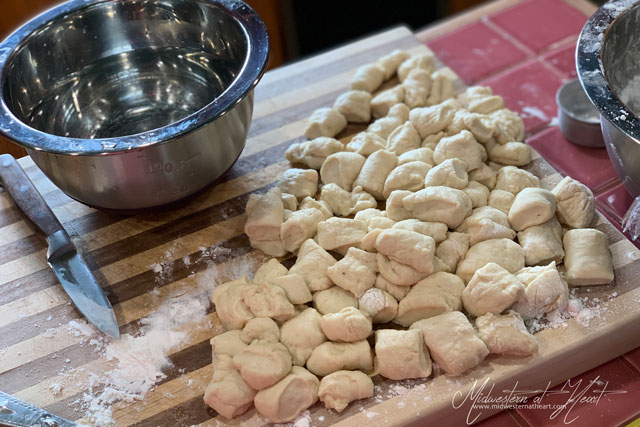
Once you have your ropes, then you cut your ropes into 1-1 1/2″ bitesize pieces.
Prepping
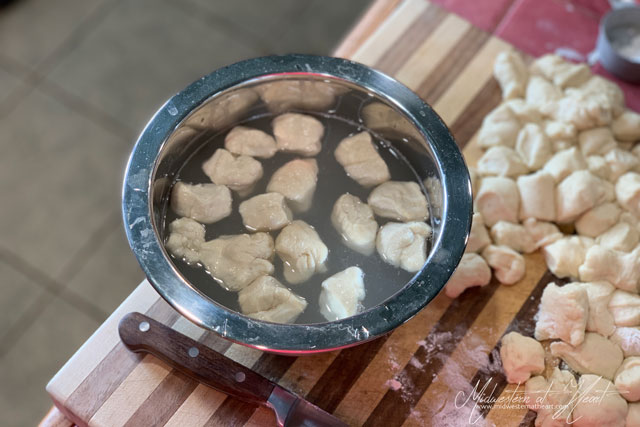
In a bowl, (I should have probably grabbed a bigger one) you add warm water and baking soda. Another note here… don’t grab a metal bowl like I did… because the water will cool and you want the option to warm it up in the microwave. Because we’ve been working on our house, my stuff is here, there, and everywhere and I had a metal bowl, so I rolled with it.
Using a slotted spoon or a spider (mine was put away) dip your pretzel bites into the water/baking soda solution.
Why do they need a baking soda bath?
I’m so glad you ask! So, you need that baking soda bath on a pretzel because it helps to move the alkalinity of the pretzel over to the basic side of pH level scale. This helps the browning reaction happen giving you that nice “hard” exterior with the warm chewy center you think of when eating a soft pretzel.
Baking
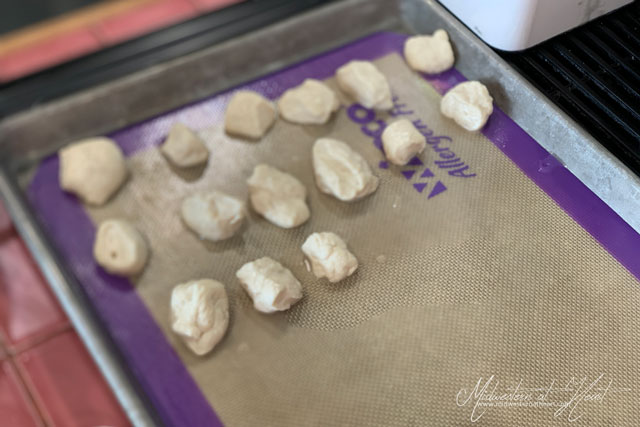
Into the water, out of the water, it’s that fast and simple. Place on a large baking sheet lined with a Silpat or parchment paper. Pop into the oven. And BAM, you’re done.
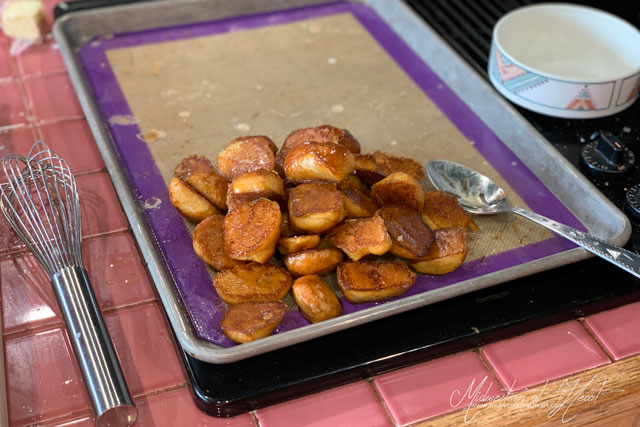
Now I can tell you those pretzels were awesome just like that. I’m not a huge salt on the pretzel fan, although I do like a little. I think you can overkill it! Those bites above tasted like a pretzel sans salt. But, I took it one step further. Added butter, sugar, and cinnamon. WHAT?!?! You read that correctly! Holy yum!
So, melt butter, dip in butter bath. Let them sit just about a minute or 2 to soak up that yummy butter because everything is better with butter, am I right? And then, I placed mine in a ziplock bag filled with the sugar/cinnamon mixture. I did that because I could shake them. I probably should have then moved to another bag to take with me… then my hands wouldn’t have been so messy when coming out of the bag, but who has time for that? You could also put your cinnamon sugar mixture into a bowl and lightly toss.
That night I was in a bit of a rush because I was headed to a painting party. You know, to draw my purple cat.
[amd-zlrecipe-recipe:1]

Damn these sound and look s o nice and yummy
That sounds like a really neat recipe to try! I’ve never tried to make pretzels before but it seems fun. Adding cinnamon and sugar sounds delicious!