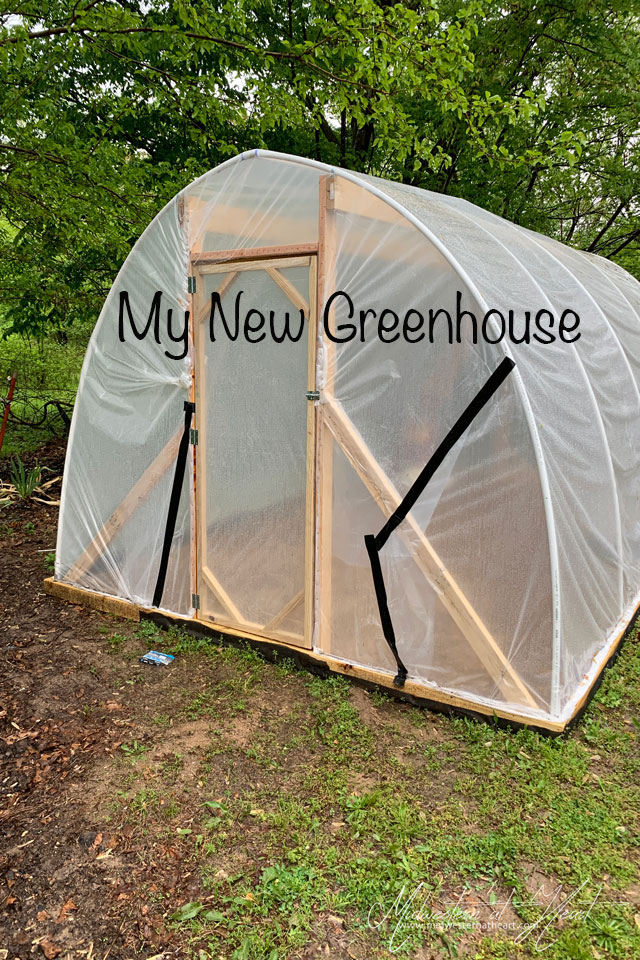
My New Greenhouse… Coronavirus Day 36
Some days I have great ideas… and other days I have ideas that make you scratch your head wondering where on earth I came up with this. Today’s project might be one of those… WHAT?!?! moments. So between the gardening and landscaping this year… I’ve really gotten into plants. I bought a lot of the flowers that I’ve used for landscaping, but the vegetables for the garden are a different story. I really wanted to grow my own plants. After garden planting #1 went awry, I decided to try the little miniature greenhouses. You know the little starter kits you buy at Home Depot (<– I used that one… not an affiliate link, just a link to what I used) or Lowes and I even found them at Dollar General.
Those starter kits are addicting. So I accidentally took over my kitchen table. Whoops. That was when I went on the hunt to see how much it would cost to make a greenhouse. There are kits you can buy but this was a DIY Greenhouse that we decided upon. This round anyway :).
My New Greenhouse

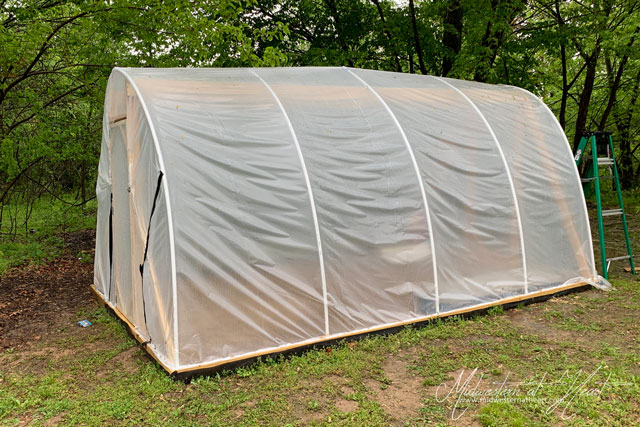
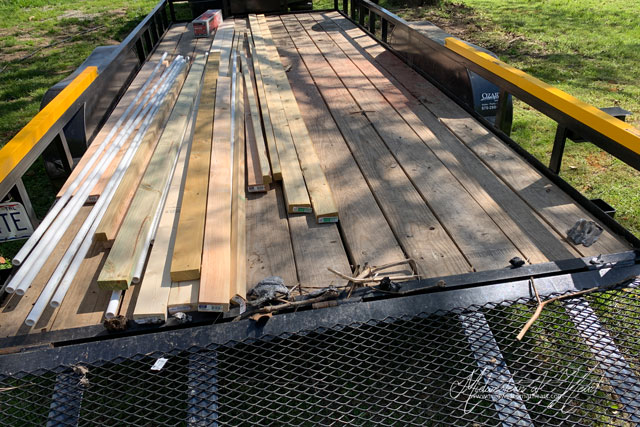
First things first… you need to decide how big it is going to be. Where you are going to put it. And buy the materials. Since I already had the trailer on from taking scrap to the scrapyard, it was the perfect time to get the materials. We decided on a 12×16. So here’s the material list:
- 5 – 20′ 3/4″ PVC (unfortunately we didn’t find the 20′ until after we had everything home and it was the next day, so we bought 10′ and tried to put together with T’s. I wouldn’t recommend.)
- 2 – 2x4x12
- 2 – 2x4x16
- 2 – 2x6x16
- 4 – 2x4x8
- Then we used some scrap 2×4’s that we had leftover from another project
- 6 – 2x2x8 (I still need a couple more)
- Landscaping Fabric
- Pea Gravel
- Black Duct Tape
- Clear Plastic
- Screws
- Staples for electric stapler
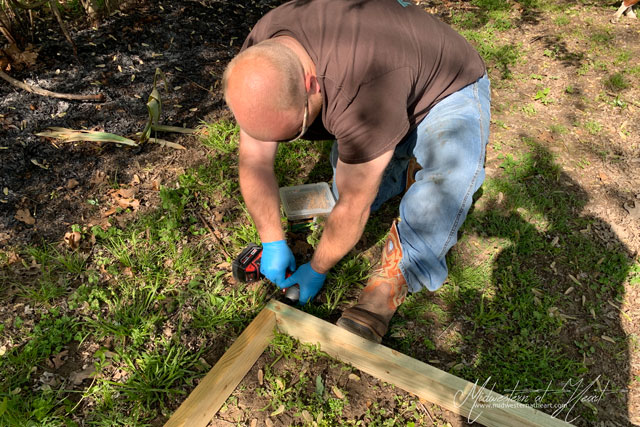
1.Set your baseboards down about where they go.

2. Set the boards on end and screw them together.
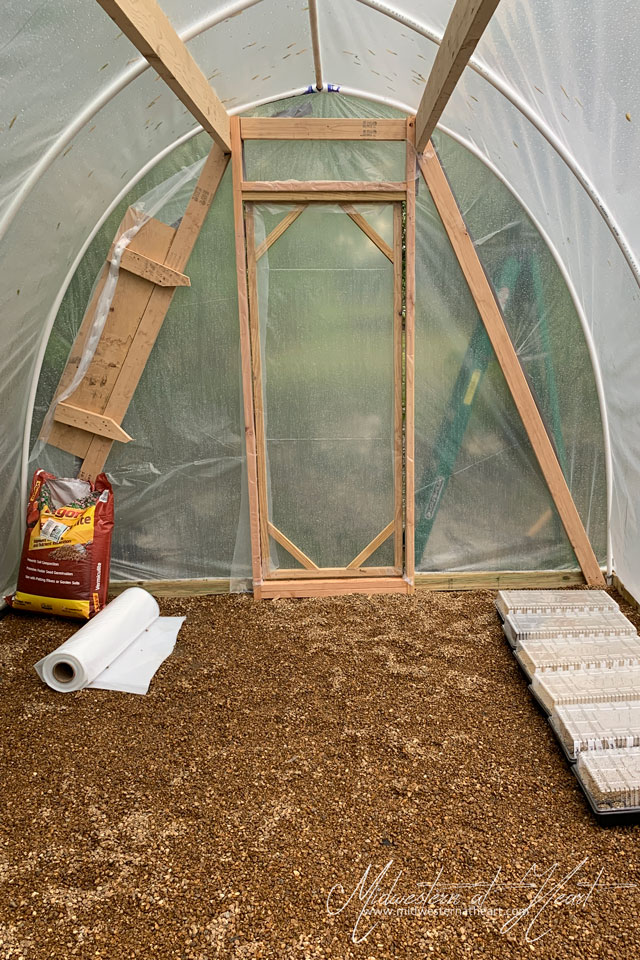
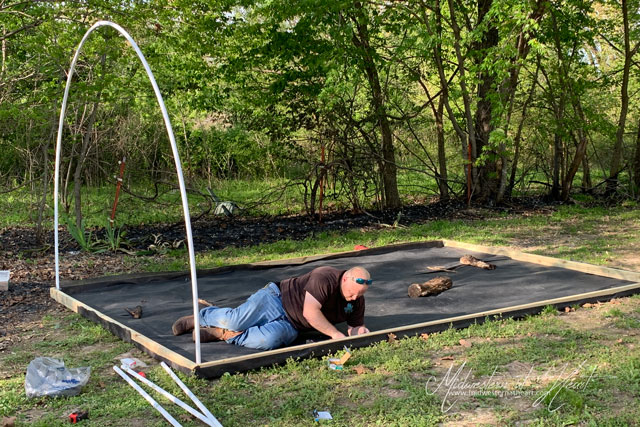
3. Next, we lined the bottom with the landscaping fabric. When you lay pea gravel you need to have a barrier between the ground and the pea gravel, otherwise, it just buries into the ground and you lose it.
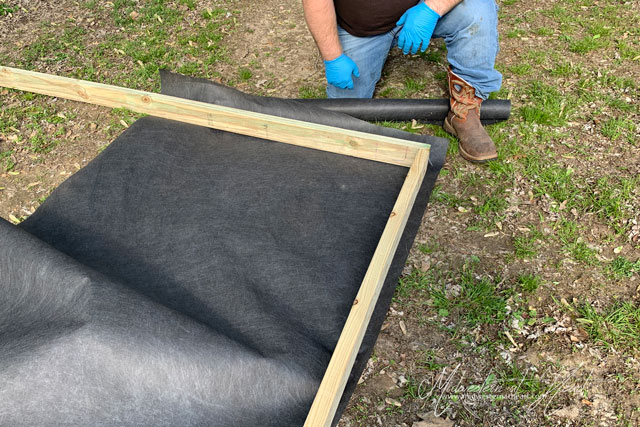
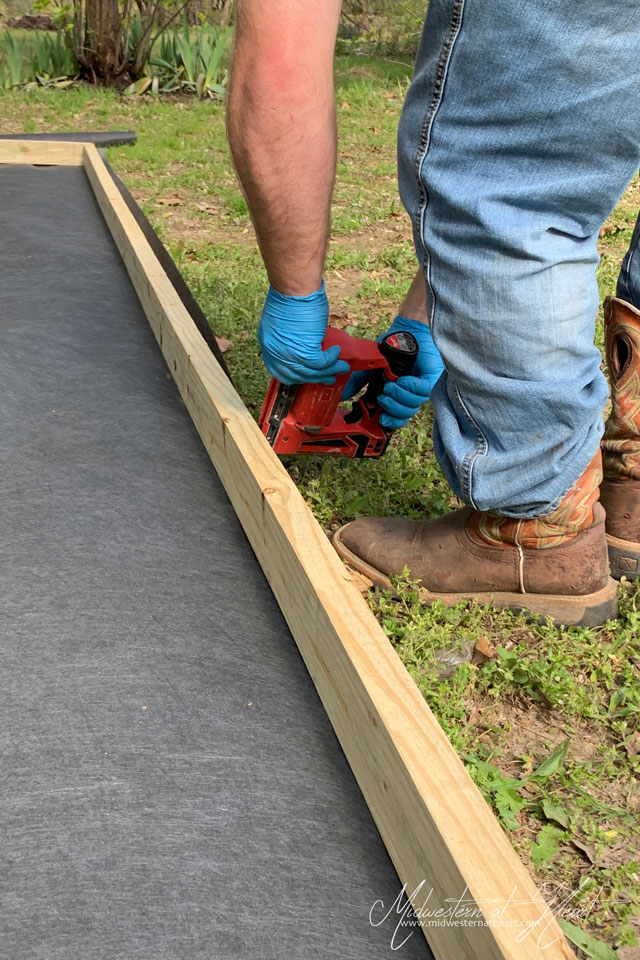
Staple the Landscaping fabric to the baseboards. Some of it we stapled to the outside, the rest was stapled to the inside. I’m not sure it matters either way really. Do make sure you overlap just a little bit, couple inches, to help with the weeds.
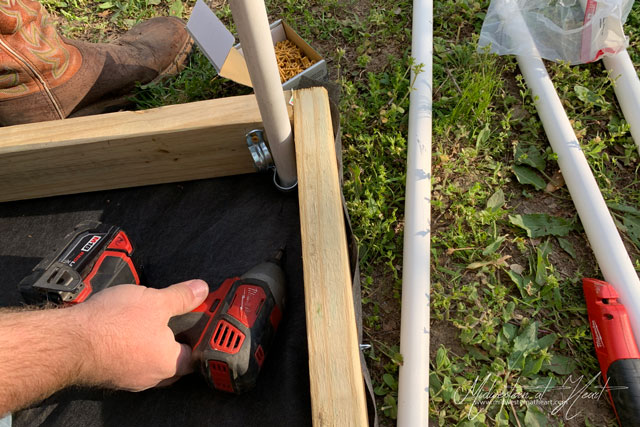
4. Now it is time for the upright PVC. Again, we used T’s to put the 10′ pipes together. With the bow on that T, it isn’t holding up. I glued a few of them together 2-3 times and still didn’t have any luck. We’ll have to replace that with the 20′ pipes we found the next day. Why we didn’t was because we already had this bought and were bound and determined to make it work. Yeah, it doesn’t work. Get the metal joints used to hold PVC to wood and use those to secure the pipe to the baseboards.
5. Next, you want to lay the Pea gravel Now truthfully, you can do this after the plastic is on, but if you put the pea gravel down first, then you aren’t trampling all over your landscaping fabric causing it to ruffle up.
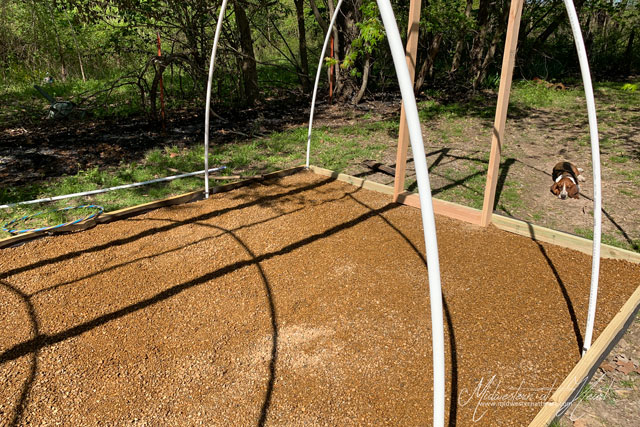
6. We used the 2×6’s up top to help support the arch of the PVC Pipe. I don’t have pictures. It also allows you to put in hooks to hold hanging baskets in the future.
7. You have to build the doors. I don’t have any pictures of that either.. We built the doors out of the 2×2 boards. Then wrapped them in the plastic. We used latch hooks to hold the door closed. I need to get a couple more of the 2×2 boards to line the inside of the door so there isn’t a gap between my door and the 2×4 door frame.
8. Now it is time to move into the greenhouse and let my plants take over in there. Eventually, we are going to build shelves/tables to work on. For now, everything has been done on a plastic folding table.