Landscaping My House… Coronavirus Day 14 & 15
This spring has been quite interesting, to say the least. Between school being postponed and doing some work at home for school (challenges)… and the fact that the oldest daughter’s school was canceled while the youngest was on Spring Break. And all the reports of the coronavirus… aka COVID-19. So much uncertainty.
But one thing that has happened I think for a lot of individuals is we’ve been given the gift of time. Something we all beg for. Everything is canceled. Can’t do anything. So why not work on that “honey-do” list.
One of the things I’ve been wanting to do is landscape our house. There have been a million reasons why I haven’t. Actually, if you look at that picture above… there to the left side of the picture, that left side of the porch… last year I planted perennial flowers. What is a perennial flower?
A Perennial Flower/Plant is a flower or plant that live more than 2 years.
While we’re at it… what’s an annual flower?
An Annual Flower lives for just one season/year.
The flowers I planted there by the porch DID NOT come back. Bummer. Here is where I tell you that I have a degree in Agriculture and I’m pretty sure I have a black thumb. My background is animal agriculture. Although when I was in college I loved the agronomy side of agriculture (plants, soils, horticulture) to the point I almost switched majors to be an agronomy major. But still… growing things is not my strong suit. I struggle, but that doesn’t mean I don’t try.
So why not give landscaping a try? I actually had to take a landscaping class in college so I got the basic gist of how to landscape. The rest comes from trial and error and the internet.
First things first
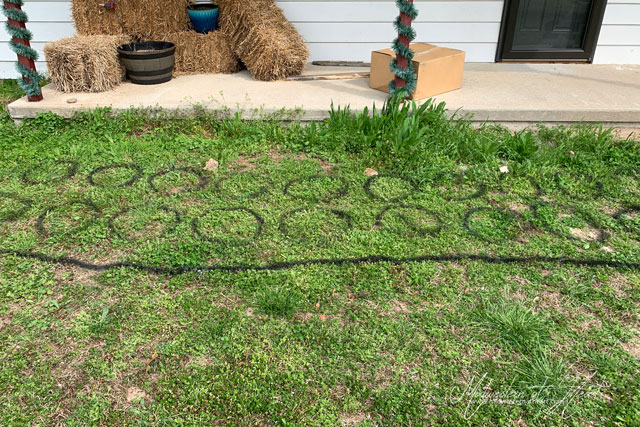
Decide on the area where you are landscaping. It is a good idea to use something such as spray paint to outline your area. Another good tip is to pay attention to your sun. Study for a few days, weeks, whatever your time frame you can so that you plant flowers that are based on the lighting.
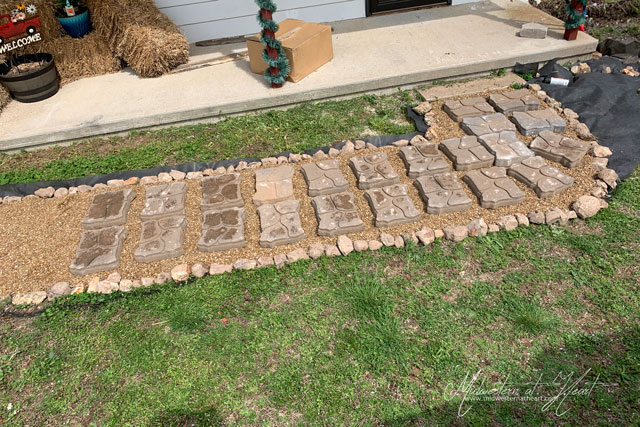
So I outlined my area. We planned on making a walkway as well as having flowers/shrubs. Next came brainstorming on how I was going to make a retainer for my material and then what kind of material I was going to try and retain.
So many questions have to be answered before you can start.
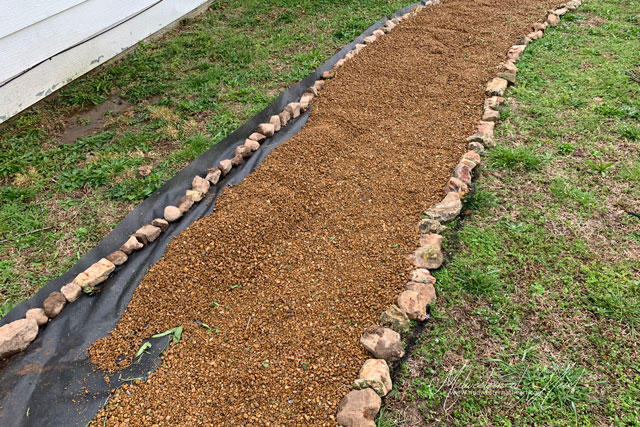
As you can tell in my picture above, we planned on some kind of stepping stone, about 12″ or so in diameter. We also decided on pea gravel.
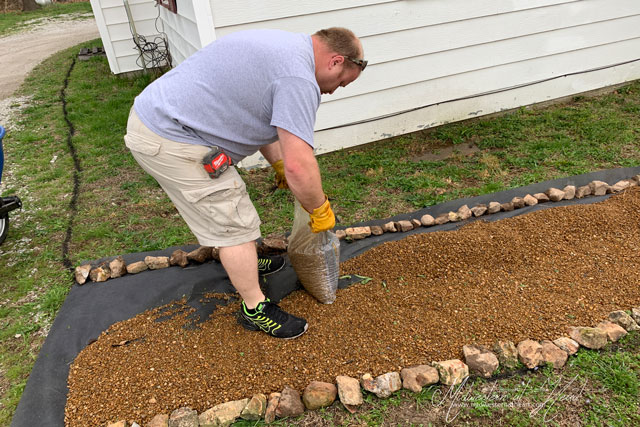
One good thing to invest in to place under pea gravel (or any kind of rocks) is landscaping fabric. There will be more on that to come, but under rocks, you especially want a landscaping fabric to help keep the rocks from sinking into your ground as well as to help control the weeds.
My Barrier
I would be lying if I didn’t say I was trying to do this as pretty as possible while keeping costs down. I mean heck, times are a little uncertain right now. It’s a bit scary to be investing so much money in this kind of thing.
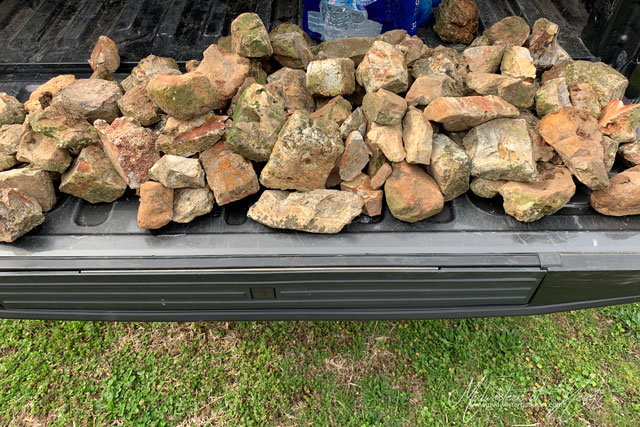
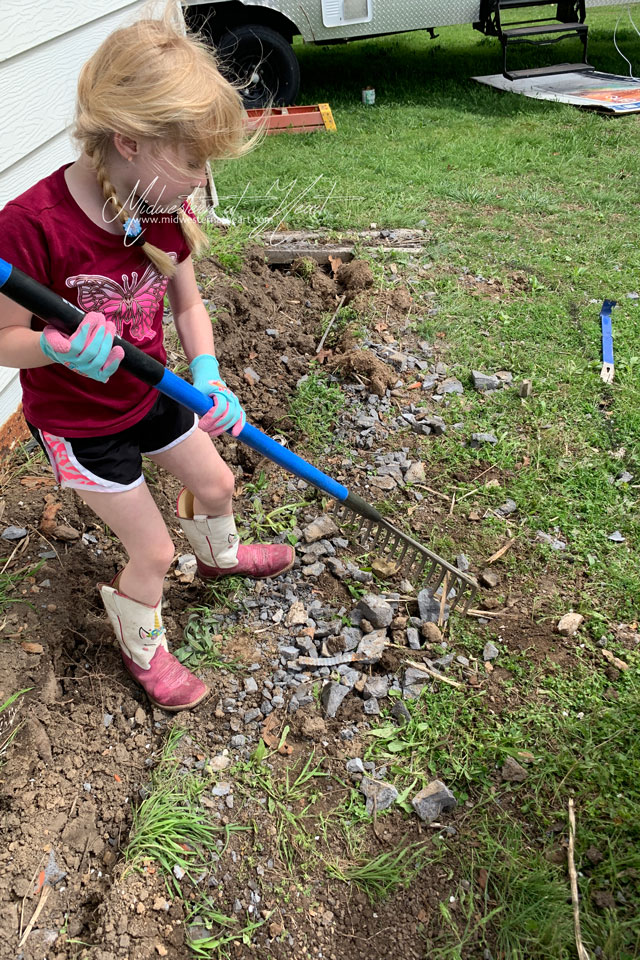
That’s when I started brainstorming again… what could I use that I had access to? Access to a lot of… oh yeah… field rocks. And my dad had a bunch that had been piled up near one of his gates. Perfect. So we hopped in the truck and off we went to pick up rocks. Who would have thought that my 36-year-old self would be picking up rocks… when the 12-year-old me grumbled every time I might have to pick up rocks. Funny how times change. And my 5-year-old, she had a blast helping pick up rocks. It became a game to see who could pick up more rocks in one arm full.
I can’t even tell you how many trips to the field we made. Plus I went and picked up the rocks I dumped in the fence row after starting my garden. I was picking field rocks up everywhere. And I really didn’t grumble about it.
Landscaping fabric
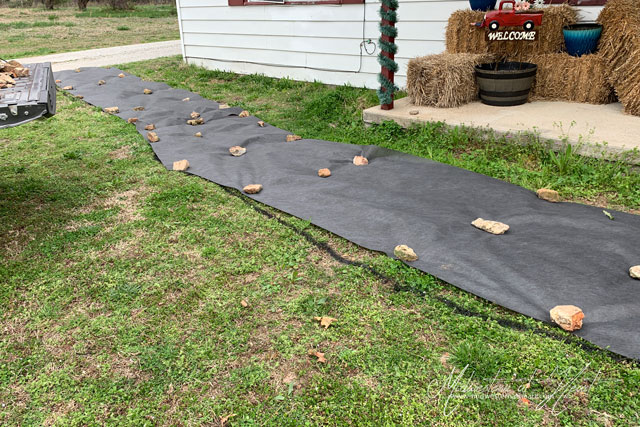
Ah, so much to say about landscaping fabric. We’ll touch a bit here… but I’m not done landscaping, so we’ll touch on this a little bit later too in a different context. But in the context of laying a pea gravel rock bed… let me state this loud and clear… YOU. WANT. LANDSCAPING. FABRIC. TO. LAY. A. PEA. GRAVEL. WALKWAY.
Did you catch that? Why? Lots of reasons but 2 main reasons… pea gravel is expensive. You don’t want that gravel to push down in the ground, do you? You could also use heavy plastic, but I like the landscaping fabric because it allows water to flow through it. It also creates a barrier to help prevent weeds. Will it prevent all weeds. No, unfortunately, it won’t. But it will help cut down in a major way.
There are different types based on years they are supposed to stand up. Eventually, they will start to deteriorate. Especially if you cut through them to plant your plants. Plus weeds will grow through them sometimes. Heck, a weed will grow when nothing else will. I bought the landscaping fabric that is supposed to have 20+ish years. I paid a little more, but I hate weeds. Really, in the long-run, the price isn’t that terrible. Again, we’ll revisit this subject.
Pea Gravel
I went with the EARTHESSENTIALS by QUIKRETE Pea Gravel. The bags covered half a cubic foot. I can’t quite remember how many bags we bought, but our first trip to the store wasn’t nearly enough. In fact, I think it took 3 trips to get our walkway covered in pea gravel. I was tired of loading and unloading bags of pea gravel.
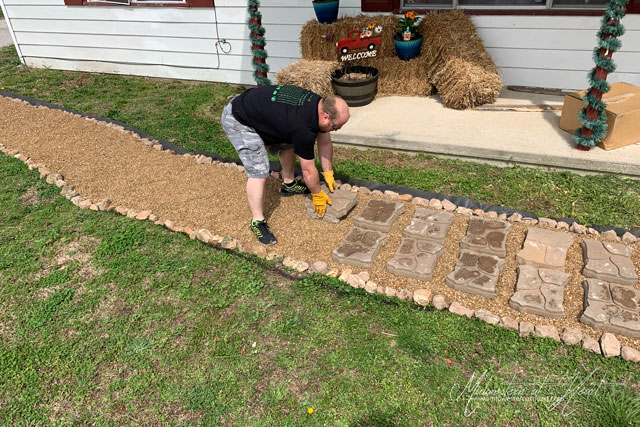
Then it was time to add the stepping stones. We went with Alameda Allegheny Concrete Patio Stone (Common: 11-in x 13-in; Actual: 11.1-in x 13.3-in). Again, our first trip to the store didn’t get us enough stones. We wound up having to go back after 68 stones. Who knew our area would take so many stones?

The original Flower Bed
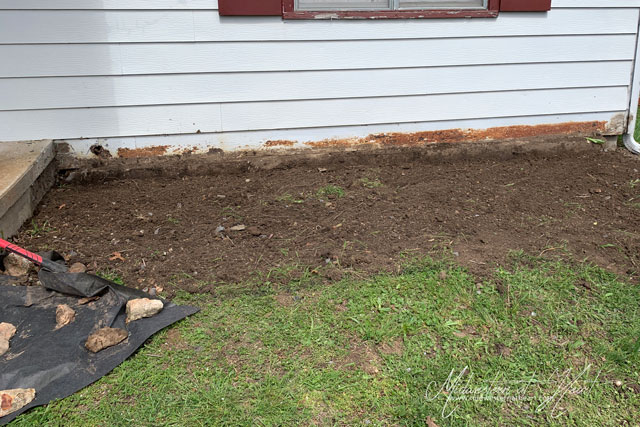
So when we bought the house, there was an original flower bed on the east side of the house. Jared pointed out that we needed to tear that bed out. Gosh, that was hard. We used a BFH (a Big F’n Hammer), a lot of elbow grease, and possibly a little cussing to remove the original flower bed.
The original flower bed was up against the house. It was concrete bricks that were cemented together. Now if you look at the side of the house… it was causing problems. That’s actually one of the reasons we hadn’t landscaped our house up to this point… because we have to reside the house. This side of the house, the siding is metal and that’s rust that the original flower bed caused. The other side of the house is the newer edition and it is sided with vinyl siding that matched the metal siding.
Really, the fact that we still have to reside our house is one of the reasons that I haven’t landscaped the house until now. That and the fact that we’re just coming into spring. And that time factor. Time plays against us sometimes.
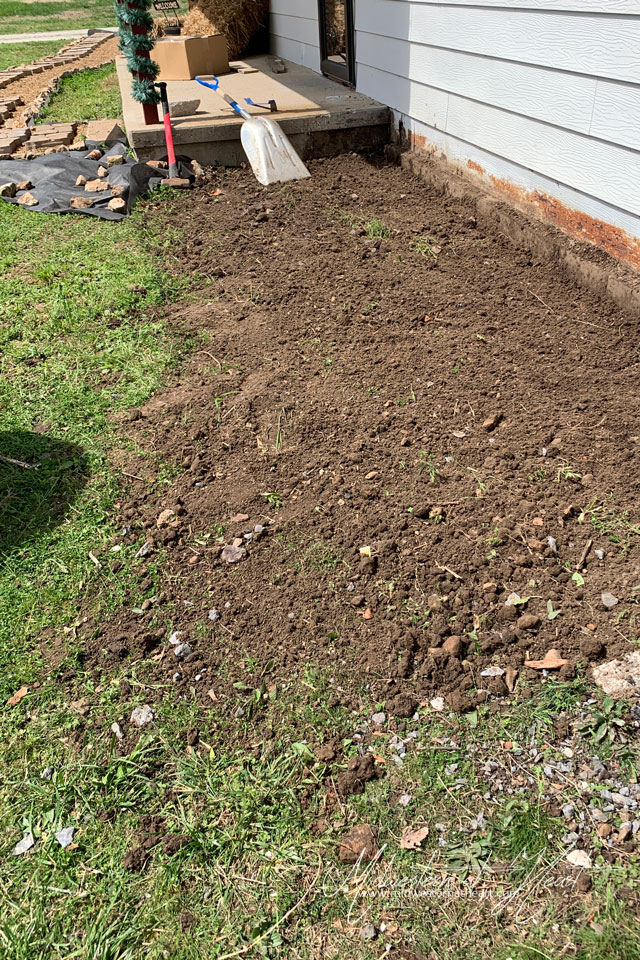
Because there was an original flowerbed there, we had extra soil (don’t call it dirt*…). Once I got most of the rocks and concrete cleaned out, it was time to spread the soil flat.
I now have the walkway planned out. It’s time to work on the flower landscape. That shall soon come. Stay tuned!
*dirt is a 4 letter bad word. That’s what I was told in my soils class. Soils contain nutrients to grow things whereas dirt just turns to mud.


