Resizing Your Photos for Blog Posts
So like many of you, I’m always trying to figure out how to make my blog better, whether it be studying photography for better pictures or it be learning that scary thing called html, which if you don’t know what you’re doing can get you in trouble :). That’s where my husband comes in to play…
Conversations at our house…. OH CRAP — Me.
Hubby: Um…. what’s up hunny?
Me: I screwed it up. Fix it! Fix it! Fix it!
Hubby: What am I fixing?
Me: I don’t know but I screwed it up!!!!!
Although I am getting better :)… ish. Let’s not brag or jinx myself!
So, one of the things that I read was it looks better to have all your pictures as large as your blog post will allow AND to have them all the same width. I pondered this a while wondering how in the world I go about doing this. Hubby to the rescue and now I’m going to share what I learned with you. You’re welcome :).

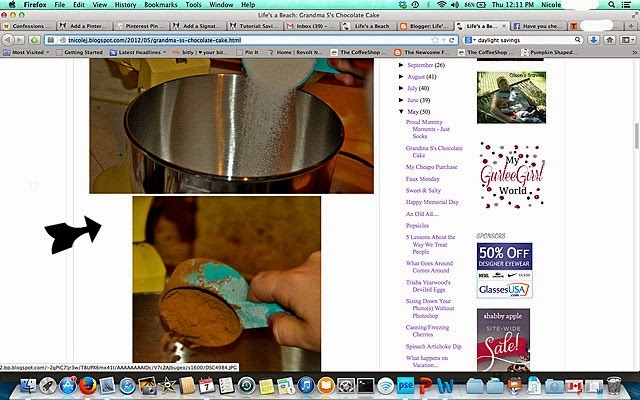
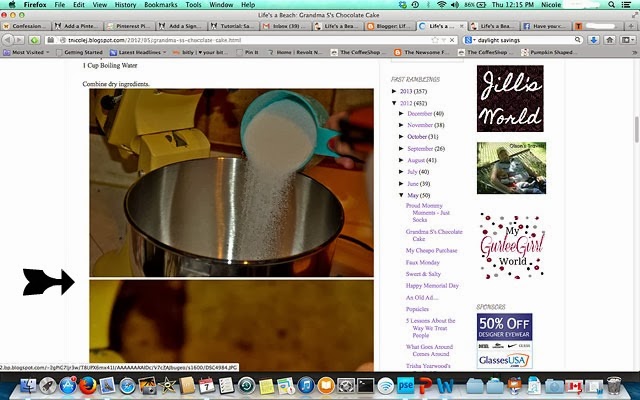
First, if you’ll notice on this old chocolate cake recipe that one picture is horizontal and the other picture is vertical. This causes the photos to look different when I make them the same size setting, but we can fix this!
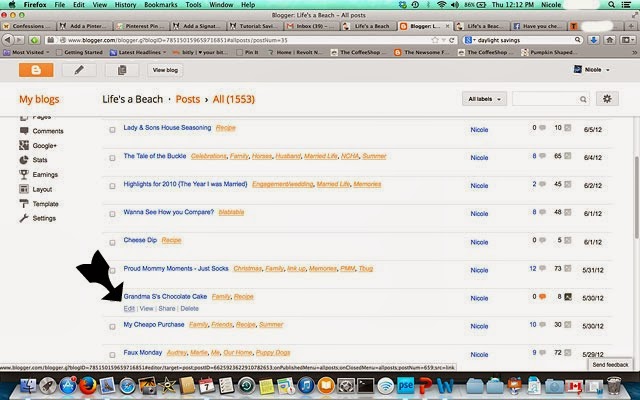
Now I write and edit all my posts through blogger. I know some people use live writer, etc but since hubby turned me off onto a Mac a couple years ago and Live Writer is for Windows, I’m out of luck. This just so happens to be a post that was already posted, however you can do this just the same with a brand new blog post. In my case, I chose the “edit” option.
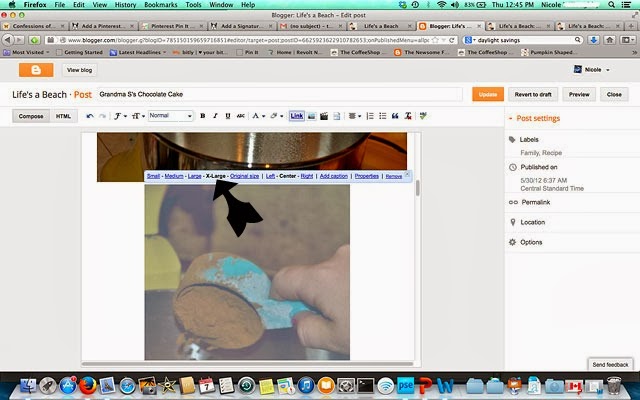
Once I’m in the post, when you click on the photo, it gives you the photo size options. I choose Extra Large photos for my posts. But with the Vertical pictures, they don’t go as wide as the horizontal photos.
So we’re going into that scary place called HTML. Click on that scary little button, I promise, it’s not THAT scary!
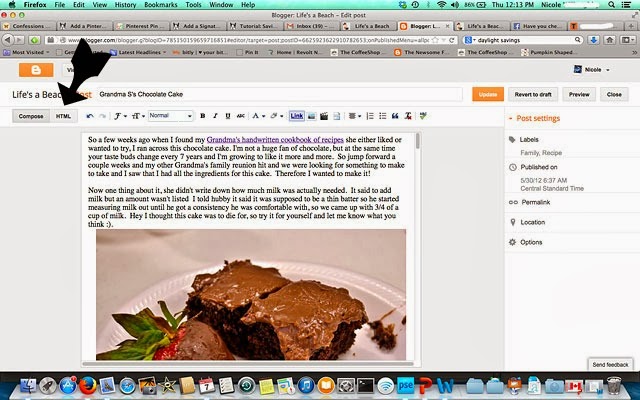
So here we see all the background information that creates our actual posts. I find my pictures by looking for height & width and the numbers. As you can see by the #1 arrow, the width is 640. That is my horizontal photo. But if you look at the #2, the width is 425. So there is my Vertical photo. To get the width to 640, and keep the picture proportional, I have to do a little math.
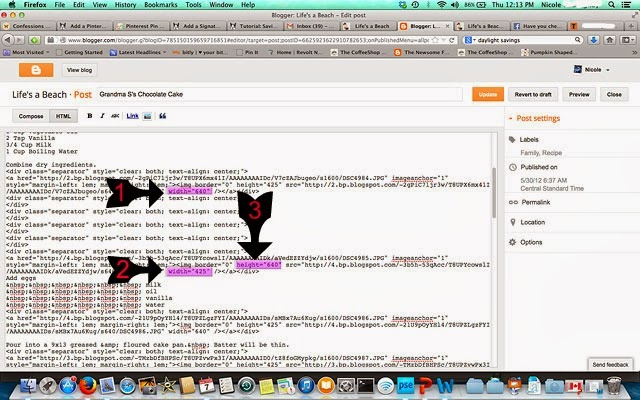
Number 3 is the height of this particular photo. So I am going to plug into my handy dandy calculator 640 divided by my width {this case 425} and hit the equals sign.
ex: 640/425=1.50588235
So then we’ll take that number and multiply it by 640.
ex: 1.50588235×640=963.764706
I always round up. Normally in Math they say .5 or higher round up, .4 or lower round down, but I always round up with one exception. If the first 2 digits after the decimal are 0’s then I’ll round down.
So on my vertical picture, I’m going to change my width to 640 and the height to 964 and viola.

To double check that I have my photo proportionate, I go to the Compose buttom which takes me back to what I’d be seeing and look, they’re the same width and my vertical photo looks great. I hit the update button and again, viola.

Now the vertical photo on the Chocolate Cake Recipe is the same width and looks great.
See, I told you html isn’t tooooooooo scary. I wish there was a faster way that I know it would do this, but until I stumble across it, this is the way I get my photos all the same width in every blog post.
Any Questions??
