Pop the Eyes
Sorry, you may not be interested in Photoshop or Photoshop Elements, however, I think I’m making myself more notes than anything. That way I know where to go back once I can’t remember… LOL :).
Slowly but surely I’m trying to teach myself Photoshop. Remember, that’s one of my 101 in 1001 items. Although I’m not sure I’ll learn everything there is about photoshop in 1001 days, but that doesn’t mean I won’t give it my best effort.
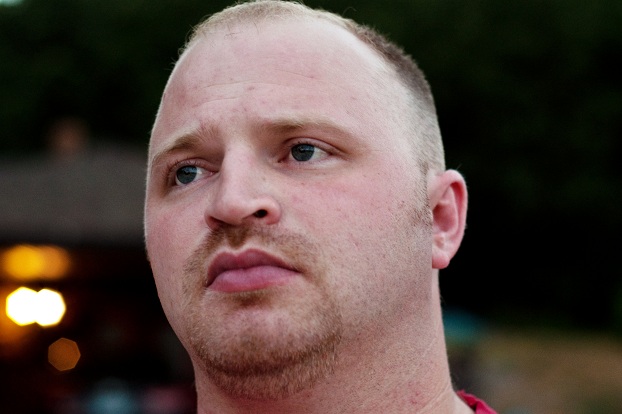
So here is the photo Straight out of Camera (SOOC).
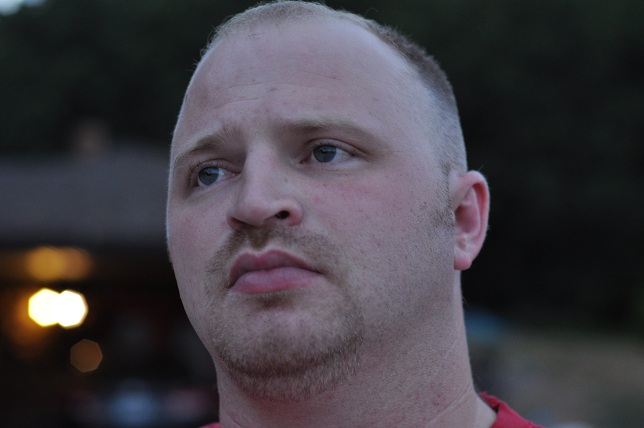
It’s a decent photo, but it could use some improvement. What I’m going to show you here though, is how to pop his eyes.
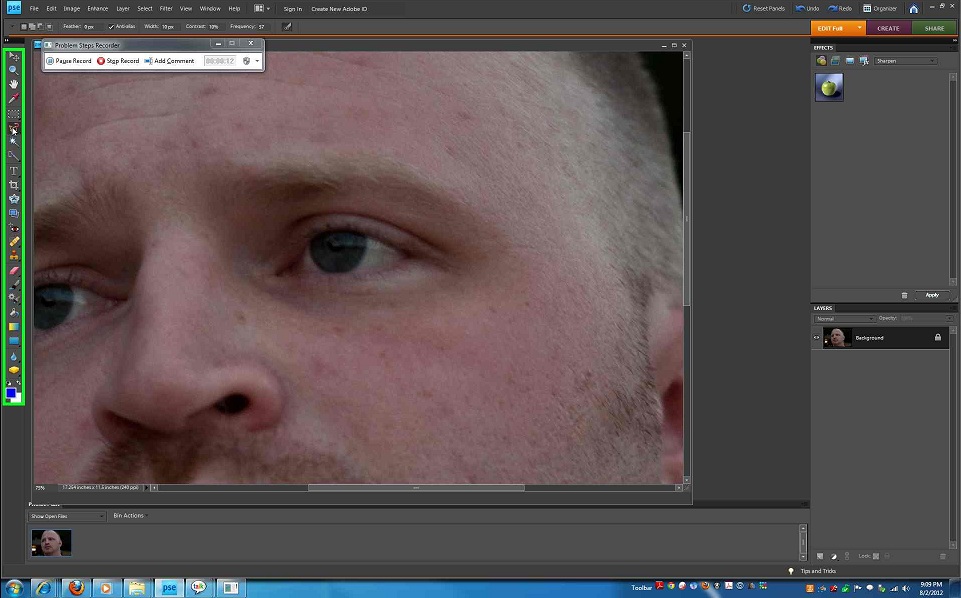
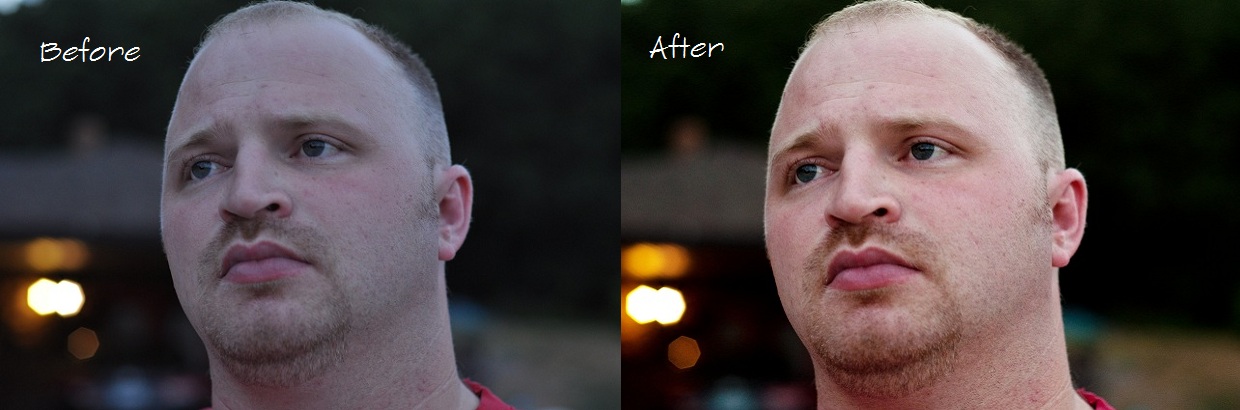
As you can see here, I played with the coloring. It was a bit on the blue side so I warmed it up a bit. Yes we both need a tan, but not like the first photo shows!

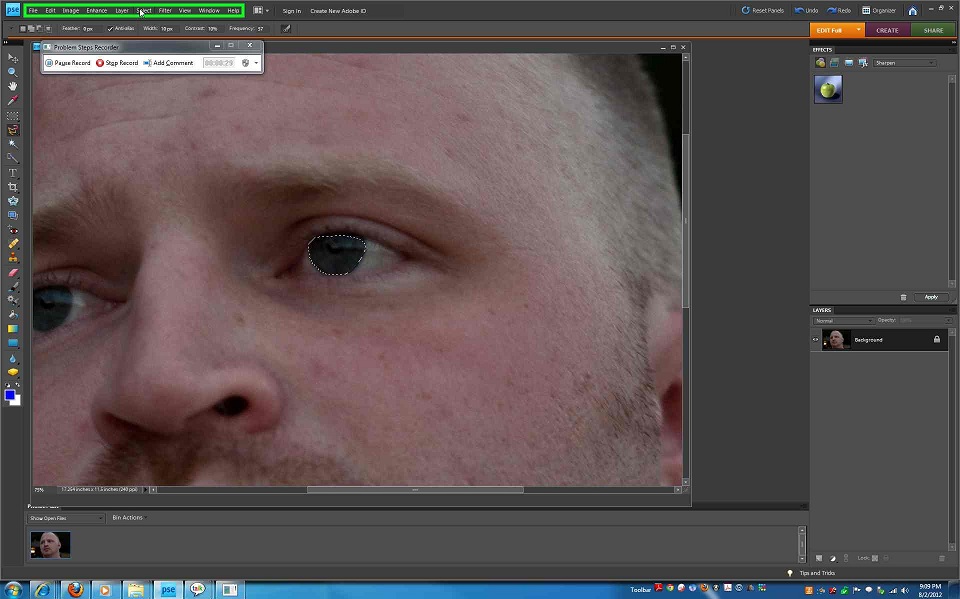
One of the first things you want to do is zoom in on the photo. I believe the original settings were on 35% and I zoomed it up to about 75%; you want to see the eyes better.


Go to the side bar and click on the magnetic lasso tool. It helps draw a circle around the eyeball (or whatever you’re working with… I’m working with eyes, so obviously, I’m going to lasso the iris.
You start by clicking to give it a starting point. Then trace around the Iris.
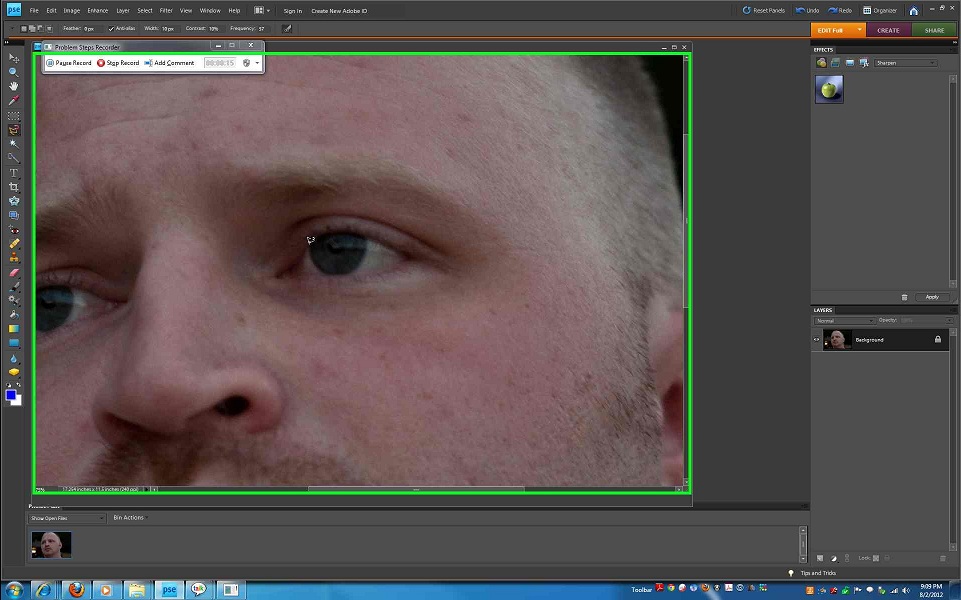
Once you are back to the beginning, tap on the starting point to complete your circle. Then it comes up as a flashing (better word??) circle around the Iris.

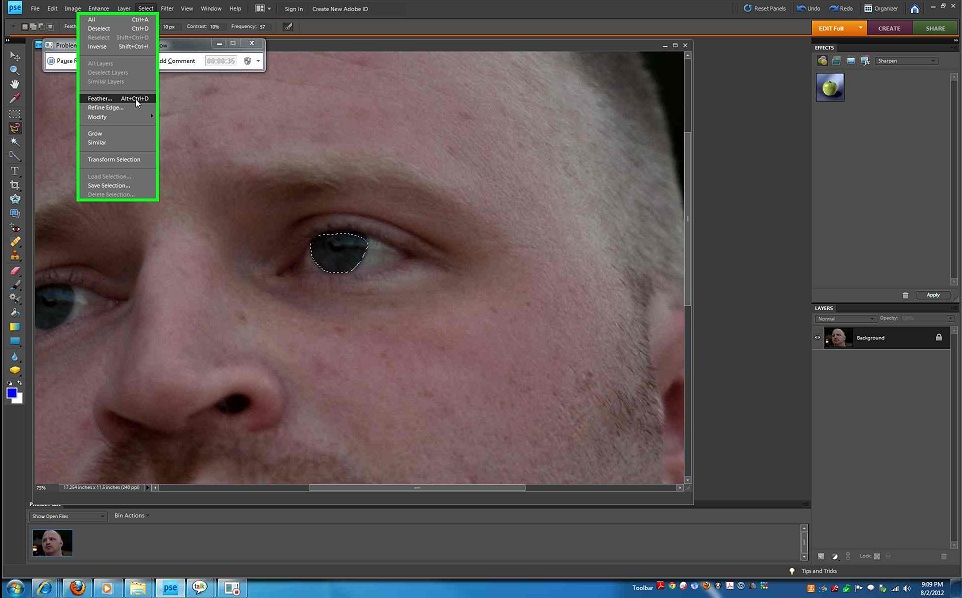
Now go to the Select tab.
Click “Feather.”
Mine started out at a 5. The higher the number you set it, the more your line will blend. The lower the number, the sharper the edge of your line. So basically if you have a low number, you miss a portion of the color or select a portion of the white, it will stand out. I set mine to a 10.
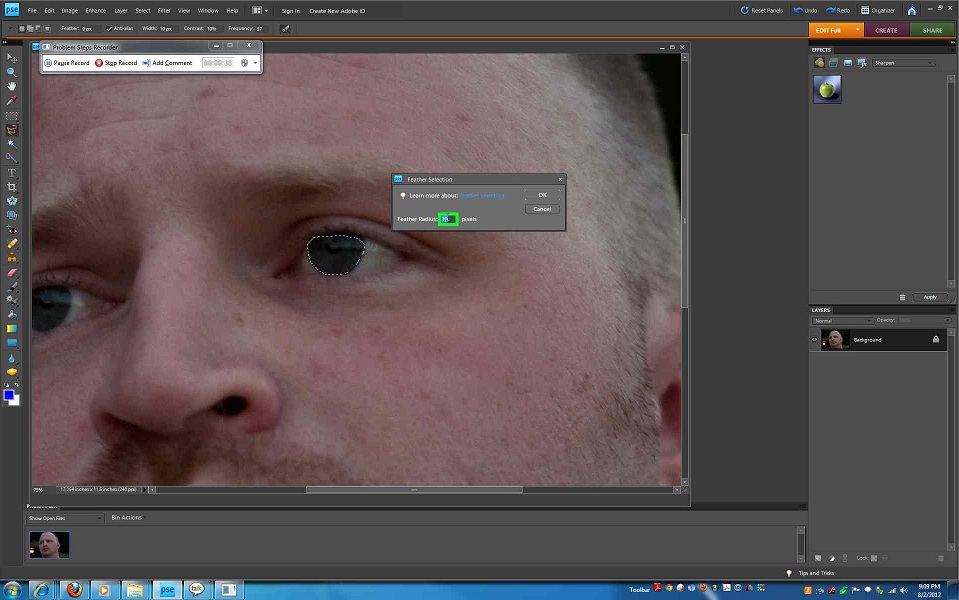
Click OK :).

Now you want to find your Unsharp Mask filter, which is very contradicting, because it actually, makes it sharper. Don’t ask me why, I’m not the expert.
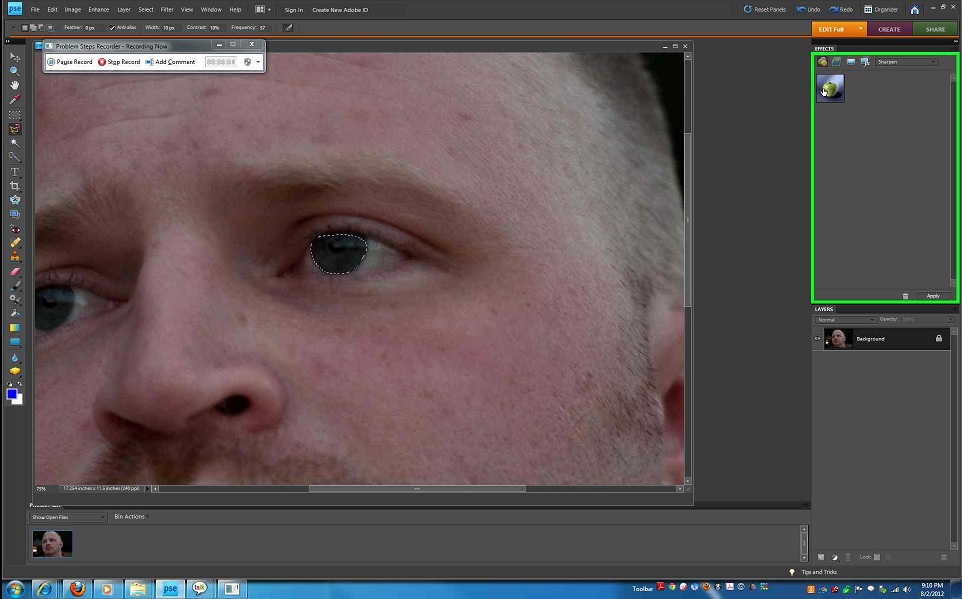
I found mine on the right Effects Pane. I’ve also seen it in Filter’s > Sharpen. Mine wasn’t there, so that’s when I found it over on the effects pane. Works the same, I assume. Now you’re going to click “Apply”.

That brings up this dandy little box.

Set your radius to 3.5. It starts out at 1. Don’t ask me why to change to there, couldn’t tell you. That’s just what you’re supposed to do. Maybe I’ll google why someday, or better yet, you google it and let me know the results, please :). Please tell me that didn’t sound toooooooo bossy.

Make sure your threshold is set to 0. Again, don’t ask why. I don’t know. Seems to be the theme of this post…. I don’t know. Maybe I should have made the title that… I don’t know.

Now, you need a steady hand here. You’re going to play with the amount. Mine started at a 55. Not sure if that changes or if that’s standard. Haven’t played with it enough, yet. Keyword, YET.
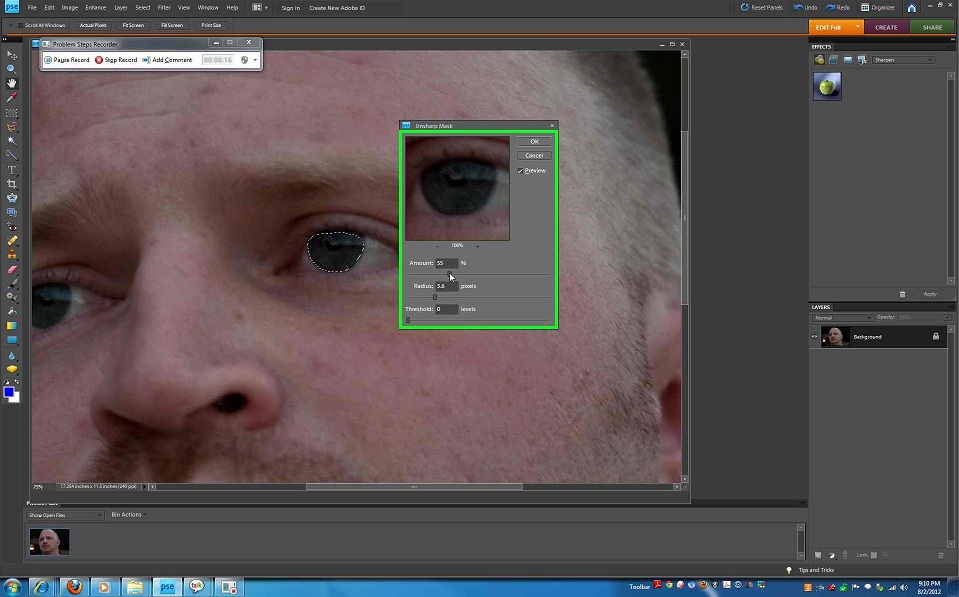
Stay below 100. If you start getting around the 100 mark, you’ll start looking like an alien from outer space. Avoid that at all costs. You don’t want government coming after you thinking you’re from Area 51.

It is fun to take it all the way up. My husband has blue eyes. It was awesomely weird. Ok so I took it back down to around 75, give or take. I kind of forget. Maybe I don’t know. Once you’ve chosen your amount number, click…. Okay :). or OK.

And this is what you’re left with.
Now remember, I played with the white balance and the under tones a bit prior to adjusting his eyes. It may not be terribly noticeable, but… that is key to a properly edited photo. Basically, you don’t want people knowing you touched, just leave them guessing.
Boy, I think I’m ready to lay back down and go to sleep. Can I get a second to that?