Cherry Pie

What is the best Pie Crust recipe without a good pie to go in it? Earlier this month I shared with you a recipe for PW’s Flat Apple Pie (also known as a Galette as we found out) and that was the pie crust I used for that. Really though, my favorite Pie when it comes to fruit pies is a Cherry Pie. YUM!

While you can buy cherry pie filling in the can, it’s almost just as easy to make your own. Now once upon a time, I had a cherry tree in my yard. Boy, I miss that cherry tree. The thing with Cherry trees is really the only time of year they give off cherries is in late May-early June depending on the weather. You also have to be especially quick so the dumb birds don’t eat all your fruit! The off time of year, where in the world do you find the tart cherries (or sour cherries as I like to call them)? 
When I went to Walmart, because as you may or may not know I live in one of those small towns in a flyover state where all we really have is Walmart, all they had were the big sweet cherries. They are okay to make a Cherry pie with, except you just cut down on the sugar added. But truthfully the tart cherries are the better tasting cherries in a cherry pie.
Finally, I went to Reasor’s in Tulsa on one of my trips there and they had the tart cherries in bags. I may or may not have stocked up on them. Then once I came back home, I went to Food for Less and they have them too. <insert Happy Dance 💃> With that being said, all you need to make your own cherry pie filling is the cherries, water, sugar, and cornstarch. Yes, it is easy to open up a can, but it tastes so much better when it is homemade! And it is truly just as easy!

If you’ve noticed, usually a cherry pie has the latticework on top. In the past, Mark and I have placed each piece right there on top of the pie, but the other day we decided to do the latticework on a piece of parchment paper, place it in the freezer for about 15 minutes, and then transfer it over to the pie. Do you hear those angels singing? OMG, that made all the difference in the world and it was super simple! Yey!
This particular pie was made for a Bake Sale for Trails for Kids. Trails for Kids is a trail ride used to raise money for our local CP Center.
Last year I made a giant chocolate chip cookie in a cast iron pan that went for $130. I felt the pressure to try again to outdo myself. This year it didn’t just rain but it poured! We had flooding and almost had to emergency evac due to rivers flooding and everything else. I’m pleased to announce that we were all okay and even with the horrible weather we had a great turn out. Numbers were down but you always have good and bad years.
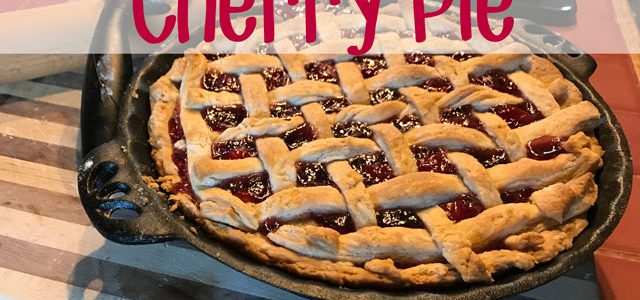
Anyway back to this Cherry pie… I placed it in a Cast Iron Pie Plate that my friend Tracy introduced me to last fall. This particular pie brought $50. Okay okay, so not as good as last year but I’ll definitely take it! 
Here was my finished pie that went into the auction. Really, the real winners are the kids who benefit at the CP Center from the Trails for Kids trail ride and all the other fundraisers and activities throughout the year.
So my Cherry pie………
Cherry pie
- 3 cups pitted cherries
- 1 1/2 cups sugar
- approximately 1/2 cup water
- 1/4 cup cornstarch matched with just enough water to make a slurry
1. Combine fruit and sugar in a pan and stir together. If cherries are soft and mushy, you won’t need additional water, but if cherries are firm, add 1/4 to 1/2 cup water. Bring to a boil.
2. Mix cornstarch with some cold water (about 3 tablespoons of cold water with 1/4 c cornstarch making a slurry), whisking to remove lumps.
3. When cherries are boiling, add cornstarch slurry mixture while stirring constantly to prevent lumps. Add enough thickening agent to make the consistency you desire. We like our pies fairly thick. Stir until the juices are clear. When the filling looks clear, it’s fully cooked. Over-cooking will start to break down the filling. If you want your pie to be more of a red color, add a couple of drops of food coloring (optional; I never do this.)
4. Pour into pie crusts and bake pies at 425 degrees for about 30 minutes or until browned.
*You can use sour or sweet cherries for this recipe, but you will need to adjust the sugar if using sweet cherries. I would use about 1/2 to 3/4 cup of sugar for sweet cherries.
**Cornstarch thickens and will continue to become thicker as your mixture cools. Do not make it as thick when hot as you would like it to be when it has cooled, or it will be too thick.
*Pulled from my old blog Paved Dirt Roads

